The Gourd Report Vol 1. - Drying Gourds
Vital and informative
information for Gourders
of all levels of expertise.
Acknowledgement, We would like to thank Tim Moyers for his artwork, for starting the Gourd Reserve, and for all the support he has been over the years. “Giving” people like Tim are hard to find, and we would like to give credit where credit is due.

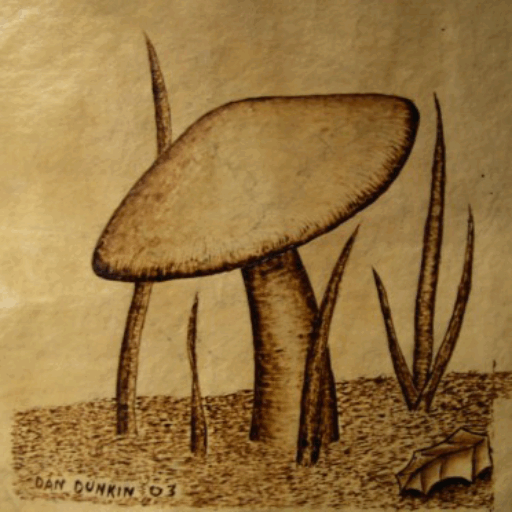
Cover Art by Tim Moyers - The Gourd Reserve
Photo’s and text by Dan & Carmella Dunkin
of The Gourd Reserve
Published by The Gourd Reserve
© 2002

The Gourd Report
The smaller the gourd, the better candidates they are for this process, the larger the gourds, the less likely. WE DO NOT recommend you try this proceedure on any kettles, or gourds that weigh over 10 pounds fresh picked and green.
That being said, I hope you find the Gourd Report educational and inspiring for some of your crafting experience.
Page 1

Hyakunari’s left to right, a dry cleaned, green cleaned, and rotted gourd, 3 methods explained in this booklet.

Example of Combined Technique to enhance the mold markings for special effects, also explained in this booklet.
The Gourd Report Vol 1. - Drying Gourds
Introduction:
The purpose of this book is to help people understand many different techniques to clean gourds, but not just to clean them, but also to be aware of possible hazards in handling gourds.
There are two primary hazards in handling gourds, one is the mold that grows on them, the other is the dust created by scraping, brushing, or sanding the inside and or outside of the gourd.
MOLD:
All mold spores can be hazardous. If you are drying gourds, and allow them to acquire mold on the surface, you should not have them in your house or garage. Mold can be kept off your gourds by wiping or spraying them with a bleach solution, (about a half cup per gallon), every day or two. Once mold is allowed to grow on the gourd, it should be handled with care, you don’t want to stick your head down in a barrel or pile of gourds that have been alllowed to mold, and start digging through them to find a specific gourd. when the omld is bumped or jarred, it can release millions of spores, which can be breathed into your lungs, and cause severe problems. The most common problems from mold spores are flu like symptoms, headaches, congestion with a cough, that can last for weeks, but worse than this, some molds can have negative health effects later in life. Our next booklet will cover Histoplasma Capsulatum spores, and Histoplasmosis, a disease caused by these little mold spores, and will show some of the long term effects that this particular mold can cause.
Mold Spores are light, they float in the air. If you have a pile of gourds to pick through, use your hose to hose them down first. once the mold is wet, the spores are weighted, and the water holds most of them down. Everyone breathes a few spores on a daily basis, but it is the concentration you need to be concerned about, and wetting the gourds well can help reduce the risk to a minimum. If you have a gourd by itself, get a towel and soak it with water first, wrap it around the gourd, then bring it in to your sink of water or whereever you clean your gourds, and dip it well while cleaning the moldy areas off.
Gourd Dust:
Gourd dust from sanding, cutting, sawing, etc, on a gourd, can also cause serious lung and other problems. Gourd dust should not be breathed in, and certain precautions should be taken, good air circulation, air filtration systems, and definately a mask. I personally have suffered from painful lungs, labored breathing, having a hard time catching my breath, cough, and headache, just from working less than 1 hour cutting and sanding on gourds. So, please be careful, be cautious, protect yourself. You don’t need to be afraid of gourds, you just need to understand all the aspects, and safety will not be a problem.
If you follow these simple precautions, you shouldn’t have a problem, and can enjoy your gourd hobby for many years to come.
Page 2
Cleaning a Dry Gourd THE OUTSIDE OF THE GOURD:
The typical cleaning of a Gourd is pretty common knowledge among the Gourd world, however, there is always something that might help to make the job easier. For those who don’t know how to clean a gourd, it is pretty simple. There is a skin layer over the hard shell which requires some scrubbing or effort to remove it. The skin removes best if it has been soaked for a while in warm water, and a little liquid detergent will help. The easiest way is to fill your sink with water, and place the gourd into it, (providing your gourd is small enough to fit in the sink), and dip a towel into the water and lay it over the gourd, to keep the part of the gourd that remains above water, wet. You should let the gourd soak no less than 15 to 30 minutes, but it doesn’t hurt to let them soak for a couple of hours, should you forget they are there, and may even make the tough spots a little easier.
Once the gourd has soaked thoroughly, using the backside of a knife, or a Chore boy or other copper type scrubber, scrub the skin off. Once you have scrubbed a few gourds, you will know how to tell when the skin has been removed and when it hasn’t. After scrubbing the skin off, you need to let the gourd dry before painting or burning on it, however it isn’t necessary to let it dry completely if you are going to cut it. For crafting, you may want to let it dry some, but not thoroughly, as the dampness will reduce the amount of dust created by cutting.

Fig 2 - Damaged from early cleaning
The Gourd Report
Vol 1. - Drying Gourds

Fig1 - scrubbing the skin off a dried gourd after soaking
A HELPFUL METHOD: of cleaning the skin off is to wait for your gourds to get light, but not entirely dry. If the gourd still has some dampness to it, the skin removes much easier than when the skin has fully dried on. However, the mold will still be active and present on the gourd, so before handling the gourd, pick it up by wrapping it with a wet towel or rag, or spray it down to prevent mold spores from being spewed into the air around you. Once you have the gourd prepared for moving in one of these methods, submerge it entirely underwater, then you can begin scrubbing.
CAUTION: Larger gourds may not fare well if you remove the skin before they are fully dry. This holds true not only for cleaning before it is completely dry, but for green cleaning, and boiling, which we will cover later in this booklet. We have had large kettles which only weighed a couple pounds, (dried from their original 11+ pounds when freshly picked), but were not yet brownish in color, but rather were yellowish and turning. We scraped the skin off, presuming it had dried to a point that it would survive, instead, it sucked in and cracked, and has several spots that resemble knife stabs.
THE INSIDE OF THE GOURD:
There are many different ways to clean the inside of a dry gourd, for over 10 years, we have used wire brush cups, and wire brush wheels attached to a 12 to 16 inch extension in a 3/8 inch drill. This will rapidly eat through all the white pulp that is attached to the inside of the shell. After wire brushing, a sanding or paint removal disk will smooth out the inside of the gourd rapidly, and make your gourd quickly usable. If the gourds are small enough, we boil them in water for 1 to 3 hours.
Page 3
The Gourd Report Vol 1. - Drying Gourds
I prefer at least two hours, and make sure the gourd is totally submerged to help reduce the risk of leaving a water line. Once it is fully water logged, the gourd will actually sink in the water. After boiling thoroughly, the white pulp on the inside will actually turn clear, or gelatin in appearance, and will scoop right off the inside with a normal teaspoon, and the greatest blessing in using this procedure is it is absolutely dust free. To prevent burns, you can run this gourd under cold water to cool it down, the insides will still scoop right out.
If you use this method for cleaning the inside of a gourd, you can place the gourd in the oven at a warm 175 degrees to dry it out faster, place the gourd upside down, (or the cut side down) to insure no puddling occurs in the bottom of the gourd.
CLEANING A GREEN GOURD:
There is a serious advantage to green cleaning a gourd, it will leave a light colored shell, that is even in color all the way around. This is really an advantage to those who like Pyrography or colored pencils, and the gourds look absolutely beautiful.
Before picking a green gourd to clean, make sure the vine has died off, and the stem to the gourd is fully dry, or you may risk loosing the gourd. Also, gourds that are not fully mature, and are not rock hard, will shrivel, but they will likely shrivel regardless which method you try.
This is a process we have used for over 10 years on smaller gourds, really large gourds have a tendency to shrivel, pucker, or crack, so we do not recommend this method on large gourds. Our primary use for this process is bottle gourds or round gourds up to 3 pounds in weight. We have tried some gourds like dipper type gourds, or gourds with long thin handles, and the handles have caved in and cracked, so we suggest you experiment with one gourd at a time, until you know what works for you, and what doesn’t..
GREEN CLEANING a green gourd is not hard, but somewhat tedious. You can use the back side of a table knife, or if you are careful, I like using my sharp pocket knife, and actually shave the skin off the gourd by holding the blade a little less than 45 degree’s. You simply shave or scrape the skin off the gourd, if you are using the table knife, you don’t have to worry much about damaging the shell, if the gourd is mature, you really can’t hurt it. You do have to be careful though, and be sure to remove as much of the skin as possible, having a flat blade on a curved surface will likely leave lines of very thin layers of skin.
On smaller gourds this is not as critical, but on larger gourds that take longer to dry, this will leave scrape lines which you will not be able to remove once the gourd is dry. However, to be on the safe side, after scraping the skin off my gourds, I then take them to the sink with running water, and use the copper Chore Boy, and lightly scrub off any remaining skin, until the surface is smooth and evenly colored.
Now that you have the skin removed, the gourd will dry much faster, however, once again with the larger gourds, they can still remain damp long enough to culture Mold, which will leave discoloration spots on the gourds. Simply wipe the gourd every couple days with a damp rag of bleach solution to prevent the growth of Mold, OR, our method of drying the gourd is in the oven!!! That’s right, turn your oven on warm, (around 175 degree’s F), and place your gourd inside on the rack, (now you have a good reason to clean your oven racks.)

Fig 3 - This image shows the boiling process. The whites pulp of the inside is turning to a gelatin type substance which will scoop out easily with a spoon.

Fig 4 - Scraping with knife the backside of a knife
Page 4

Fig 5 - Using a Chore Boy copper scrubber with light pressure to remove any skin remnants missed by the flat backside of the table knife. This insures a smooth even finish when the gourd is dry.

Fig 6 - In this image, we have removed the top of a Kettle, with a cut that conforms to our crafting plans for this gourd. This will be placed in this 5 gallon bucket for 3 weeks, then repeated 2 more times between wiping and rinsing.
The Gourd Report Vol 1. - Drying Gourds
Smaller gourds will dry in a day or two, larger gourds may take a few days of 12-18 hours per day, but they will be ready to craft in a very short time, later in the book we will explain how to use this method to get your gourd from the vine to the crafting table in 3 days or less. You will know when the gourd is dry, by hitting it into your hand to break the seed pack loose on the inside, once you hear the seeds rattle around, you know it is ready.
The inside of the gourd is cleaned the same way as mentioned earlier in the dry cleaning portion of this booklet.
Vol 1. - Drying Gourds
The Third method of cleaning a gourd is called rotting, and it is literally that. The shell and the seeds will not rot in this process, but the skin of the gourd as well as EVERYTHING attached to the inside of the gourd will rot, and rinse right off with no more than a little rubbing with your hands. The advantage to rotting a gourd are multiple, it cleans the inside of the gourd as well as the outside of the gourd, the final product will be a nice, light colored shell, without the mold markings, again great for Pyrography and light artwork, and last but not least, it is absolutely dust free!! The down side is, it is not odor free, and it takes a few weeks to complete the process.
Once your gourds are cut, us a coat hanger to puncture the white vegetable matter on the inside to allow the water to penetrate into the gourd, then they must be fully submerged in water for 2 to 3 weeks. The process is called rotting because it does rot, and as you would imagine, it creates a nasty odor, very similar to a septic tank.
Because of this, as well as the risk of mosquito’s in the late summer early fall, we use 5 gallon buckets, and put the lid on tight. Do not place the bucket in direct sunlight, or where it will get very hot, as it could cause the lid to blow off releasing it’s pungent odor, though we’ve not lost a lid yet. During the first rotting of the gourd, do NOT change the water.... The whole purpose is to allow bacteria to culture within the water which will actually eat and decay the skin and the vegetable gel on the inside of the gourd. I always wait 3 weeks, then I am ready for the first rinsing. Please do yourself a favor, and invest in a box of rubber examination gloves, and wear them while cleaning.
Page 5
The Gourd Report Vol 1. - Drying Gourds
3 weeks past, now your ready... Take the bucket to a remote location away from your house, the back corner of your yard, or to a field, (if you have neighbors close by, you might want to ask them first, because the first rotting is by no means pleasant), take the lid off your bucket and dump it out. Have a hose running near by, (do not use a spray nozzle or you are likely to get splashed in the face with it, YECH!!), and take your gourd pieces out, rinse them off, and use your hand under the running hose to wipe the skin off. Dump the inside of the gourd out wet, and rinse it out thoroughly. The seeds, and everything should pour right out of the gourd like a seed soup. Once rinsed and cleaned, put the pieces of gourd back into the bucket, fill it with water, and place the lid back on the bucket. Each time you fill the bucket, you should fill it to the brim, and let the pushing of the gourds by the lid, displace the excess water in the bucket, to insure that the entire gourd is submerged. Once the lid is on it, let it soak again for 2 weeks.
Soaking the gourd the second time accomplishes 2 things, one it reduces the odor the second time around, and it also creates additional rotting for anything that may have been left behind. After rinsing them off from the second rotting, place them back into the bucket, fill it with water, and soak again, this time for a week, dump it and fill it again for another week. This will remove almost all the smell entirely.
Once removed from the bucket, allow the gourd to dry, rotate the gourd, from right side up to up side down for the first few days to prevent water spotting from water settling in one spot on the gourd. If it is odor free, you can place it in the oven to dry.
If you do not do the additional rotting, and only soak the gourd once, it will take months for the odor to leave the gourd, but by using the repeated process, your gourd will be beautiful, and the odor will be gone when it dries.
This sounds like a lot of work, but in reality, the work is not as hard as the scraping and sanding one would normally do. The time required to rinse a gourd each time is only a minute or two, and the water does all the dirty work. It is also absolutely dust free and mold free, which is good for your health and your lungs will love you for it, and the end result is a beautiful gourd.
Up until now, we have explained the cleaning techniques that have been used by people and cultures from around the world, but now we would like to introduce something new, or at least, we’ve not heard of it being done before.
The Gourd Report Vol 1. - Drying Gourds FROM THE VINE TO THE CRAFTING TABLE IN 5 DAYS
This technique requires green cleaning, so your gourd must fit the criteria of being one that can be green cleaned without shriveling. We do this with everything from mini gourds, (which will actually dry in 2-3 days) to our 2-3 pound Hyakunari’s, which will dry in 4-5 days. We also have a method by which you can knock a few days off the drying process for these larger Hyakunari’s.
Once you have scraped and lightly scrubbed the skin off the gourd, set your oven to 175 degrees, and place your gourd inside the oven. Check your gourd once or twice per day, depending on how large they are will be a big factor in how long it takes them to dry. The first sign of the drying process is the surface will get lighter in color, and will turn tan. Once the entire shell is a tan color, the shell has dried, but there can still be a lot of moisture on the inside of the gourd.
The next factor is the weight of the gourd, a gourd that starts off at 2-3 pounds, will weigh ounces when it is dry. Keep checking until the gourd feels like it is about as light as you expect it will get, and hold it firmly by the top and shake it to se if you can hear the seeds rattling around. If it seems light enough but you do not hear the seeds yet, try hitting it into the palm of your other hand to break the seeds loose, if they do not break loose so you can hear them rattle, then it is not yet dry. If you can hear the seeds rattle, it still may not be fully dry, but with some experience you will be able to tell the sound of dry seeds and wet seeds, as the wet insides give a muffled should, more like hitting a sponge or blanket, while dry seeds have a nice crisp sound.
Fig 7 - A Hykunari cleaned by rotting process
Page 6
The Gourd Report Vol 1. - Drying Gourds
Another way to help determine the dryness is a small postal scale that will weigh in grams. You can easily check a gourd every 4-6 hours, and as long as the weight is dropping, there is still moisture present. The progress of weight loss will begin to slow down, and eventually will remain unchanged, at which point you know the moisture is gone.
WARNING
When drying a green gourd in the oven, keep your temperatures below 200 degree’s. Water boils at 212, creating steam, and steam creates a powerful pressure in an enclosed environment. with a sealed and uncut gourd, steam pressure can cause the gourd to explode in your oven, creating a mess you don’t even want to think about!!!
The Gourd Report Vol 1. - Drying Gourds FROM THE VINE TO THE CRAFTING TABLE IN 3 DAYS:
Is this possible? People wait for MONTHS to get their gourds to the crafting table. Yes, it is very possible, in fact, as we were working on the experiments and documenting this book, we took some fresh green gourds, and were crafting them the next day, but we’ll get to that next. However, this process does require gourds that will be used as bowls, lidded boxes, or something that you are going to cut open. Same as the previous section, with one exception, once the shell has turned tan, which in most cases takes one to two days, the gourd can now be cut open. Using our own experience as an example, we make trinket boxes out of bottle gourds, which the first cut we make is to cut the gourd in half. As soon as the entire shell has a tan or brownish appearance, (tapping on the shell you can tell the shell has cured), I take my gourd to the band saw and cut it open. You must be careful though, there can be a lot of mush on the inside of the gourd, as it has not yet dried out. Using a spoon, or some type of scooping/scraping tool, (we use spoon shaped ceramic clay tools), and you will want a bucket or something to scoop the innards into, (they can be quite slimy and not always odor free at this point), scoop out all the loose seeds and pulp. Inside the gourd along with the seeds is a membrane like substance that is attached rather firmly to the navel of the gourd, in most cases when it is wet like this, it is difficult to grip and tear loose, so it may require several attempts at cutting it with the scraping tool, but you should be able to get it out. Once you have the bulk of the matter out, use your scraping tool to get most of what is at tached to the inside walls of the gourd, don’t try to scrape everything out, the whole purpose is to get rid of the bulk that takes so long to dry. Once you have the shell of the gourd pretty well done, you can take it to the sink to rinse off the brownish or mushy stuff, and anything that may have run down the outside of the gourd, so it doesn’t stain the finish. Once it is all clean, pop it back in the oven, in less than a days time at 175 - 200 degrees, it should be dry, the remaining insides will be crispy, and yes, it is ready to craft. The Gourd Report
Vol 1. - Drying Gourds A FEW THEORY’S:
Let me interject one of my theories here about the puckering of gourd shells. The white foamy stuff on the inside of a gourd, if allowed to dry fully, on some types of gourds appears to be very similar to Styrofoam. It is a spongy matter, and like a sponge, as it dries it pulls or shrinks. On the inside surface, where this pulp is actually attached to the shell, this shrinking can have a very strong effect on the shell. My first theory was the shriveling of a gourd had to do largely with the actual spongy stuff on the inside of the gourd drying and shrinking, and while this appears to have some effect, we’ve learned from our next experiment, that even with the removal of this pulpy matter, the shell can still shrivel and pucker.
FROM THE VINE TO THE CRAFTING TABLE IN 2 DAYS OR LESS:
Once again, let us express that this process will not work with every type of gourd out there, and larger gourds are susceptible to damage through shriveling. Please do not try this on your prize gourds until you have experimented enough to have a feel for what will and will not work. In the process of doing these experiments, we lost some very nice gourds, based on theory and thoughts, so we highly recommend you try a sampling of what you have before jumping in with those prize babies. On the thoughts of gourds and baking gourds, and a method of cleaning someone mentioned to us of steaming a gourd, (they said this is what the Koreans do), it suddenly hit us. What is a gourd? It is a vegetable, I wouldn’t want to eat one, but it is a vegetable. What happens when you poach or boil a vegetable? It gets soft and mushy. So, here is what happened when we put this idea to the test. We first take a gourd that we are going to cut open, to make a planter, a scene on the inside, a vase, etc. Go ahead and make the cut now, while it is green, using a teaspoon we scooped out the bulk of the vegetable matter so the water could get to the insides of the gourd, put it in a large pan full of water and started the boiling process. We let it boil for about 1-2 hours, you will see the white veggie matter turning clear, almost like gelatin. Another note to this, is the gourd will sink, or almost sink as the shell and the pulp become waterlogged. Once it is ready, remove the gourd from the pan, you can run some cool water on it so it is cool enough to hold on to, and with a teaspoon or table spoon, simply scoop out the insides the same way you would scrape the ice cream off the inside of your ice cream bowl.
Page 7
The Gourd Report Vol 1. - Drying Gourds COMBINING TECHNIQUES FOR NEW AND SPECIAL EFFECTS
Dry scrubbing a gourd requires a gourd to sit for a lengthy period of time, and at some point during the course of the curing process, you make a decision to either clean the mold off, or let it remain to create a mold mottled effect on the final dry gourd. Green cleaning is normally done before this molding process begins, and oven drying is a technique we’ve suggested here in this booklet. Through experimentation, we’ve discovered a technique that yields the light patches of shell on a gourd, that normally comes from green cleaning, but not only includes the mottling effect of the mold, but actually increasing the contrast between the two by using oven heat to deepen the molding effect.
For this effect, you must set your gourd out to begin the drying process, as if you were going to let it dry completely, but keep an eye on it. You want the mold to begin to grow, in fact, you want to let it culture well, but you also want to clean the gourd before ALL the green is gone. For our gourds, we like the effect we get with gourds that have more of the round spotted molds covering most of the gourd, with a few small area’s or patches that are still green. The green area’s of the gourd will remain light, and will not darken, even with oven temperatures around 200 degrees F. For the most part, using a chore boy copper scrubber, most of the skin will come off the molded area’s quite easily, since the skin is still damp, and the mold is holding the moisture at the surface level, but the green patches may require using the backside of a knife as you would in green cleaning. Remember, you can lightly use the chore boy over the green area to insure there is no residual skin remaining.
Once all the skin is removed, put in the oven at around 175 - 190 degrees F and wait for the gourd to finish drying. (Iy is important to learn your oven, and the right temperature and watch the gourd. Too high heat will burn the mold markings, a lighter temp will create a nice reddish color to the mold markings) The heat of the oven will actually bake the mold, and toast it, but the temperature will not be high enough to toast the green area’s of the shell. If you have the right type of mold growing on the gourd, you should end up with a rusty reddish finish where the mold once permeated the gourd shell. The oven not only dries out the gourd faster, but it bakes in a stain from the mold itself.
The process is quite simple, and there is room for creativity and experimentation with this process. You can use a light spray of bleach solution once at some point in the early stages of the molding process, and get a running or streaked effect of the mold, try dripping some bleach in an area, or use bleach in one particular spot to see if you can develop a reddish mottled gourd with a nice light colored area for the purpose of doing a wood burn or artistic picture. We have not tried everything there is possible to try, we’ve only laid the groundwork. So have some fun and be creative, and experiment a little, but remember, experimentation should not be done on your prize gourds.
There are some points you should keep in mind, and remember when trying new cleaning processes on gourds:
1) Always beware of mold, not only at cleaning time, but at planting time there are molds in the ground, it helps to dampen the ground before tilling and digging, to help keep the mold spores in the ground from becoming airborne, (especially in the Midwest where Histplasmacapsulatum is prevalent, it yields a disease called Histoplasmosis with flu like symptoms), and mold spores are prevalent on drying gourds as well. All molds should be treated with care and caution.
2) NOT ALL GOURDS are suitable for green cleaning, oven drying, etc. Bottle gourds, and gourds shaped like bottle gourds seem to be the most stable gourds in these processes. Also all the large gourds we tried, failed. The largest gourd we were successful with was Hyakunari’s in the 3 pound range, but every gourd we tried in the 10+ pound range shriveled and/or cracked. We had nothing in between these sizes to experiment on, so where the line should be drawn we cannot pinpoint at this time. We recommend for gourds in excess of 10 pounds to be cleaned by the rotting process, as this seems to work with Zulu gourds as well as a variety of larger gourds, however we have no data either from our own efforts, or even from the Japanese Society on rotting long gourds like snake gourds etc. There is a convenience factor due to their size in finding a tub and making one submerge for a lengthy period of time.
3) long handled, or long thin shelled gourds like snake gourds do not fare well with green cleaning. They are most likely to shrivel and crack.
4) Every gourd should be left on the vine until the vine stem has turned brown and dried. A gourd that has not fully cured will not likely survive regardless what cleaning and drying process you put it through.
5) Last but not least, we cannot guarantee your results, we have tried and tested, and given you the information of what worked successfully for us, to help to avoid the failures for you. What you have read in our booklet is the result of lots of experiments, trial and error, successes and failures. We green cleaned and oven dried over 100 gourds ranging in size from a mini Sennari weighing only an ounce or two, to Hyakunari bottle gourds weighing as much as 3 pounds. In the green cleaning and oven drying process, we lost about 5 - 8 gourds that apparently had not fully matured or were too thin shelled. Each result is fully dependent on the careful selection of what is or is not fully cured, the type of gourd, the thickness of the shell, and on nature itself.
We wish for everyone to grow and develop the most beautiful gourds you have ever grown, and hope that everyone might find some, or all of the information we offer from our experiences to be useful in producing a more beautiful finished piece of artwork, be it a crafted gourd, or a gourd in it’s natural state.
by Dan Dunkin
