The Gourd ReportVol 2. - Growing Productive Vines
Vital and informative
information for Gourders
of all levels of expertise.
Acknowledgement, We would like to thank Tim Moyers for his artwork, for starting the Gourd Reserve, and for all the support he has been over the years. “Giving” people like Tim are hard to find, and we would like to give credit where credit is due.

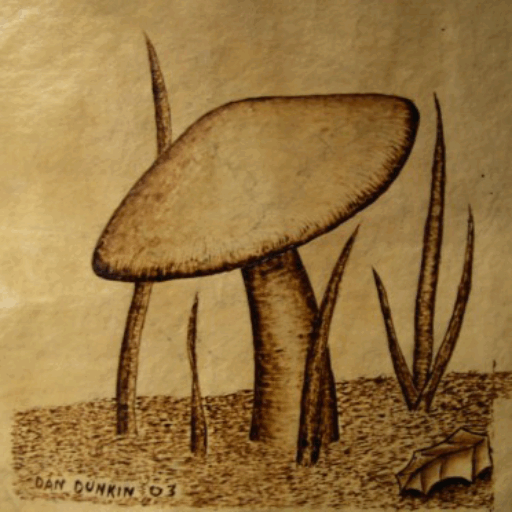
Cover Art by Tim Moyers - The Gourd Reserve
Photo’s and text by Dan & Carmella Dunkin
of The Gourd Reserve
Published by The Gourd Reserve
© 2002
Page 1
Insecticides Cucumber Beetle Control

Cucumber Beetles are approximately 1/4 inch in length
Cucumber Beetles are perhaps the Gourd Growers enemy number 1, and some kind of insect control should be used to control their numbers, the most common type of insecticides are chemical like Sevin, however we like to steer more toward non chemical insecticides. Both the spotted and the striped Cucumber Beetles are cousins, and as far as their appetite and damage potential to gourd crops, they are basically identical. While Cucumber beetles can damage the vines and your gourds, their greatest potential threat is probably their potential for carrying diseases. The most common threat of disease comes from the Mosaic Virus.
MYTH: Cucumber Beetles are the only insect I have, if I kill them I might not get pollination. This is simply not true. Cucumber beetles have no pollen hairs ot any other method for transporting pollen from one flower to the next. Cucumber beetles serve only to damage your plants, and potentially spread disease.
Control of cucumber beetles is difficult at best, and insecticides whlie helping to control the cucumber beetle population, can also kill your pollinators. The best defense against being completely overtaken by Cucumber Beetles is by using garden tillers in the fall after harvest and tilling again in the early spring. Cucumber beetles burrow into the ground and lay their eggs there. The eggs are lighter than the dirt, and running a tiller through the dirt tosses the ground, making it almost fluid momentarily, and the lighter eggs and larvae get shuffled to the top. Subsequent freezing during the winter time will kill off these lavea. I have found that if you forget to till in the fall, tilling in the early spring will also kill off most of the new seasons Cucumber beetle population. One season, we tilled the entire garden to within 6 inches of our trellis. The rest of the garden was planted first, and the plants came up and were growing great, with no sign of cucumber beetles. After they got started, we planted vines up close to the trellis, and as soon as the shoots had their baby leaves, Cucumber beetles came out of that small strip of ground and began attacking these new shoots near the trellis, and did not migrate to the other gourds until they became too populated for the new shoots. This is evidence of how thorough they are at laying their eggs through out the entire garden, and how critical it is that the entire area get fully tilled. We tried saving a few late starters using Sevin insecticide, but it burned the saplings to the point they could not produce a viable fruit.
If you do not control this insect population early by using a garden tiller, you run the risk of them coming in from the previous year in such numbers that your early vines may be in jeopardy and you may not be able to grow decent vines. If you use Sevin insecticide , (the most commonly used insecticide for cukes), on your early shoots, the Sevin can actually burn the stalk of the vine and stunt it's growth, making it hard or impossible for the vine to pass food and water to the rest of the vine. This can result in death, or possibly a stunted vine, most commonly unproductive, however we have grown a few stunted gourds in the process of learning this, but it is not recommended. 🙂 It is preferential to use natural methods to control the cuke population, one of our favorites is to grow radishes all around the area. Let them grow with the vines, cukes hate the spicy vegetable that grows in the ground. Another side effect of Sevin on gourd vines is it can make your leaves appear to have a mosaic virus by burning the leaves in spots.
If you disturb a cucumber beetle, they don't normally fly away, but rather when they are threatened, they simply fall to the ground, this is their defensive escape, and cucumber beetles burrow into the ground. Laying down a good ground mulch like straw, hay, or grass clippings in a good 10 inch thick bedding, this hinders the Cucumber beetles ability to easily reproduce, thus reducing the future population. Mulch should be taken tight up to the base of the vine.
Page 2
Organic Insect Control Cucumber Beetles
Once the season gets underway and the cucumber beetle population begins to grow, there are some things you can do to help keep their numbers down. Organic insect Control for cucumber beetles includes growing other plants like Radishes, grow some cucumbers, these beetles love them and prefer cucumber over gourds. You can use insecticides, but we recommend against using chemicals as they weaken your plants, hinder the soil, and they will kill your pollinators and your good insects as well as the cucumber beetles, however you can grow cucumbers near by and use insecticides on them as they have a different group of pollinators. Some people find hot sauce tonics mixed with a little liquid detergent to make it stick will send Cucumber beetles on a search for more tasty sources of food. There is stick trap stuff you can buy, and put up little signs in your garden, (if you can keep your gourds from climbing on them), use a piece of plywood on a post, about 1 foot square, paint it white with a big yellow dot, and cover the board with the sticky trap product. Cucumber beetles will be attracted to it, and once they land on it in investigation, they will be trapped. You can also collect your gourd dust from sanding and cleaning, including the innards and treat this with Sevin then place it around your garden in pie tins. If it rains this must be brought in as the rain will break down the poison. Rotenone is also a tremendous insecticide, it is all natural, and once it gets into the ground it biodegrades, but it is expensive. Within two weeks it breaks down to it's natural elements without damaging the soil. Again we would recommend treating gourd dust with this as opposed to indiscriminate spraying.
As an alternative to insecicide, an Organic insect control and Garden friendly way to inhibit the natural activity of the Cucumber Beetle is use of home made sprays. One such spray is this:
There are many useful formula’s to deter cucumber beetles from biting your plants, most consist of a dish soap and water combination, with added ingredients like Garlic, hot pepper juices, mints, and other ingredients. There are many such formula’s that can be found on the Internet and in organic gardening books. Once again, do not spray where these will repel your pollinators, and spray during the closed flower period of the day. One such formula is:
2 tablespoons red pepper (Red pepper spice will do.)
6 drops dish soap
1 gallon water
Mix all ingredients, let sit overnight and stir to dissolve as much of the pepper as possible. Spray the mixture weekly to repel insect pests. there are many recipes for this, this is just one that we've used. Do not use these sprays while the flowers are open as you do not want to repel your night time moths.
Cucumber beetles will go through 4 stages of plant attack.
Stage 1: During the beginning of the season before your gourd vines start running, (vining), they will eat the baby leaves, and even potentially eat the center of the vine between these leave, leaving the vine unable to grow any further. Using garden tillers in the early spring will usually eliminate the stage one problem.
Stage 2: Your gourd vines have begun running and are looking healthy, then suddenly one vine begins to look weak or diseased. Close inspection of the vine normally from 1-3 feet from where it comes out of the ground, you may find a rather large hole in the vine exposing it's hollow center, and you may witness a population of cucumber beetles crawling in and out and around this area. (There could also be a hole in this area due to the presence of a vine borer, that is another problem.) For this, Sevin or Rotenone applied locally to that specific area can stop the damage long enough to allow the vines to begin producing flowers, then they won't bother this spot again.
Stage 3: Your vines are flowering, now your cucumber beetles have another favorite treat, the flowers. If you have a bad infestation, you can go out in the morning to late morning after the flowers are closing up, and pick one off and open it up. It is not uncommon to find 2-3 or more cucumber beetles inside these flowers, or you may notice flowers that the petals have holes eaten in them. Cucumber beetles will be satisfied with flowers for a few weeks in most cases, and don't seem to attack healthy young gourds until they have reached a near mature level.
Stage 4: at this stage, especially with an over-run population of cucumber beetles, you will begin to find those stomach sickening holes and surface scars on your gourds created by cucumber beetles. While this is discouraging, it is part of nature, and our experience has shown us that you will still have a lot of gourds that won't be bothered. Different types of gourds seem to hold more attraction to the beetles than others do, so growing a variety will help to reduce damage to some varieties. Before we learned how to control the Cucumber population, we had one season we were so over run with them, we didn't think we would have any gourds or vines at the end of the season. We had one gourd that had a hole in it about a half inch in diameter, and cucumber beetles were crawling in and out of the hole like ants at an ant hill. Yet we gathered about 1500 good gourds from our 1/3 acre plot that year, most of which were unmarred by the actions of the cucumber beetles.
In summary, using organic insect control, do the following - 1) Till the soil both Fall and Spring. 2) Plant radishes early among your gourd vines. 3) find a plot or section of yard away from the gourds and grow cucumbers, use insecticides on them. 4) Put up a few sticky signs, and before you spread the sticky stuff on it, write "Welcome" on it while maintaining a devilish grin on your face. 🙂 5)use a homemade insect repellent on your gourd vines.
Keep your garden healthy by insect control as opposed to total annihilation.
Page 3
Organic Fertilizers
Mulching with Grass: Grass clippings will also produce lots of organic fertilizer as worms and molds break it down and carry it's decomposed by-products into the ground. You may have heard of using worm wee or doo-doo for fertilizer, worms love grass clippings and in the winter they will feast on leaves. Leaves are also a great organic fertilizer, we once covered our garden in about 6 inches of leaves in the fall, and by spring there was a small ground covering less than 1/8 inch thick, in some area's the leaves were entirely gone, and the ground looked like Swiss Cheese where the night crawlers came through, and surprisingly there was little or no weed growth where the leaves were spread. When we tilled, there were worms in countless numbers as they multiplied on their own in vast numbers due to the rich supply of food. Needless to say the Robins loved us. One garden shovel full of dirt would commonly turn up 5-10 night crawlers, and the soil was soft, moist, and rich looking and our gourd vines were the healthiest vines we had ever grown.
Mulching with grass is tremendous, it provides lots of nutrients, the worms will multiply and take care of the excess, and if applied deep enough, it will keep the weeds out of your garden as well as putting a burden on your cucumber beetles. It is natural and will not harm the ground, as long as you apply it to the surface of the ground it will provide nitrogen and other essential components your gourd vines, (and vegetables) need. During the season, you will need to continue adding more mulch as it will decompose, and the worms will eat it faster than you might realize.
Fish Emulsion: Another tremendous fertilizer is fish emulsion. We use a liquid fish emulsion in liquid form that is used as a topical fertilizer. In other words, you spray it on the vines and leaves, and the gourd vines will absorb the fertilizer. The actual chemical numbers are low in fish emulsion, like 1's & 2's, but the fact they are topically applied make them very effective. Another nice thing about natural fertilizers like this is you cannot burn your plants with them. We purchase concentrated fish emulsion to which you only ad a few ounces per several gallons, and use and Ortho Garden sprayer that attaches to your hose. I have actually spilled the concentrated fish emulsion on my gourds, and it had no ill effect. Once you spray the vines with this, you just might see a dramatic effect in 2 to 3 days, especially if your having a problem due to poor soil conditions. I've sprayed stunted corn that was 1/3 the size of the rest of the crop, and within a week the stunted corn shot up to nearly the size of the rest of the crop. It was too little too late, but what a dramatic effect. You might notice your vines taking on a deeper green, growing faster, etc. Although the instructions say to spray every few weeks, I found that spraying once a week helped to continue a healthy crop, and a very productive fruiting season.
There are lots of other fertilizers, however the organic fertilizers seem to be the safest, and even the most effective to use. Mulching with grass, we've found you can grow the same crops year after year in the same area, and have very healthy vines.
Page 4
Diseases
There are two common virus' that gourd growers are concerned with, Mosaic Virus and Powdery Mildew. Mosaic virus will create a yellowing or brownish yellow spotting, or mosaic spots on your leaves, thus it's name. This same appearance can be caused by Sevin and other insecticides and people are often concerned they may have this virus, not realizing it was the poison they applied that is causing the problem. Mosaic is the worst problem of the two, as it has a residual effect. If you get mosaic virus this year, you will probably have it again next year. Powdery mildew is seasonal, it can damage and kill your vines this year, but unless circumstances promote it's growth next year, it won't have a lasting effect.
Mosaic Virus: There is a lot you can do to help to prevent the spread of mosaic virus, the first being to stay away from growing other plants that are susceptible to mosaic virus, the most common being tobacco. Tobacco is so capable of carrying mosaic virus, that if you smoke in your garden and the tobacco in your cigarette is contaminated with the virus, your gourd vines could become contaminated.
Testing for Mosaic: A simple field test, although it is not 100% positive, is to take a piece of the vine and break it then hold the two pieces together for a few seconds to allow the plants moisture to develop in the damaged area, then slowly pull them apart in a straight apart motion. Mosaic virus will cause the vines fluids to be a little slimy, and it will string out. If you do not get stringing, then you likely do not have mosaic virus.
Treating mosaic virus: If you have confirmed mosaic virus in your gourd patch, if you catch it soon enough, pull the vines that you feel may be contaminated in order to hopefully prevent it's spreading. If you have used Sevin or other chemical pesticides on your gourd vines, do not be quick to pull vines, this may simply be a latent affect of the poison on your vines and leaves.
If you have absolutely confirmed the presence of Mosaic virus, (although it is rather rare these days, it does still exist), your gardening tools must be sterilized with bleach, and you should grow corn or other non mosaic friendly crops for at least 2-3 years. Once Mosaic is in your soil, it will contaminate future crops unless allowed to die out. Your gardening tools can also spread the virus, as well as contaminated tobacco in your cigarettes or smoking or chewing tobacco if you are a tobacco user.
Powdery Mildew: Powdery mildew is very common with gourd vines, but there are some things you can do to help reduce the chance of it attacking your crops. Powdery mildew is more common in the humid states, and it seems to prefer trapped and stagnant air. Cucurbits seem to be more susceptible to powdery mildew than lagenaria's, (cucurbits are your yellow flowering ornamental gourds, cucumbers, etc., Lagenarias are the hard shelled gourds with white flowers). If you grow both crops in close proximity, normally toward the late summer you may see powdery mildew developing on the cucurbits first, then see it spreading to your lagenaria gourd vines.
One method to help ward off the onset of powdery mildew is to grow your vines on a trellis or fencing so they are of the ground, and can have air circulation through and around them. If you do get powdery mildew, we've been told that spraying with 2% milk will eliminate the mildew. We've never had a problem with powdery mildew, and therefore have not had to test this treatment. Powdery mildew developing late in the season as the temps change and you are heading into the Fall is normal. I think this is due to the vines realizing the end of season and are weakening.
Page 5
Lagenaria vs Cucurbits
VARIETIES: The most frequently asked question is, will a lageneria, (hard shelled gourd), cross with an cucurbit, (ornamental gourds)? The answer is no, the two varieties are genetically incompatible and will not cross pollinate. If this interaction is possible, no one has yet revealed the secret.
LAGENERIA - can be distinguished by their white flowers and fuzzy stems
CUCURBITS — are distinguished by their yellow flowers and usually prickly stems.
LAGENERIA - Night bloomers requiring primarily nocturnal moths and other nocturnal pollinators
CUCURBITS - Daytime bloomers, pollinated primarily by bee’s and other day time pollinators
LAGENERIA - thick shelled gourds, mostly solid in color or lightly marked
CUCURBITS (ornamentals only) - Multi colored, decorative, used as ornamental gourds for decoration.
LAGENERIA - If mature, dry to a nice hard shell, insides can be cleaned out, surface can be scrubbed or scraped clean, (see the Gourd Report Volume 1), leaving a nice hard, (like wood), container that can be decorated or used. Lagenerias will last for years, and in some cases even centuries.
CUCURBITS - while there are a few varieties that have a thick enough shell to preserve and use for artwork, most ornamentals have a thinner shell, and are inappropriate for long term use.
Lagenaria gourds are our primary focus at the Gourd Reserve since these are the artists canvas. This page gives a simple run down of some of the more distinctive and noticable differences between the two families of gourd. Cucurbits are the typical ornamental gourd you see in grocery stores and street side stands during the holloween and Thanksgiving season. Most of these gourds are not seen much beyond this short season because they rot and do not last much longer than this. Lagenarias on the other hand are decorated by many artists and crafts people around the world, and are cherished for years by many people for their beauty and artistic value. A gourd taken care of will last a life time and be can be handed down from generation to generation.
We hope this helps for those who are new to gourding.
Page 6
Pruning the Gourd Vine
Encouraging production
Most people know about growing gourds and understand the fact that they are a vining plant. The main shoot of the vine will grow male flowers, if you prune your vine too short, you will end up with a limited number of females and quite likely no male flowers at all. If you let the main shoot grow too long, you miss prime opportunity to encourage fruiting and increased production. (more information below image)

(Do not go by leaf count on image, picture for visual reference only)
The main vine should be allowed to grow to a length of 16-20 leaves, then the end of the main shoot should be pruned off. This shocks the plant into preservation of it's specie and the reproductive process begin. At the center of the primary vine and leave knuckle a new vine shoot will grow, these are called laterals. The main shoot will produce male flowers only, and the laterals will produce female flowers from the knuckle of the first four leaves of that lateral, (this number may vary depending on the vine and type of gourd). The remaining leaves on that lateral will then produce more male flowers.
Basically the premise is this, the vine wants to grow fast, by pruning the end of the main shoot which is primarily male flowers, it quits growing in length then puts its growth energy into the laterals which will produce female flowers, (the fruit of the vine). As each lateral develops four leaves, each of those four knuckles will produce at least one female. Beyond this it will begin producing male flowers once again. Allow the lateral to grow at least two leaves beyond the female flowers, (about 6 leaves), then prune it again. Once again, each knuckle of each leaf on this lateral will then produce second generation laterals, repate again as far as you can follow this growth. Be sure to allow at least 6 leaves per lateral to allow for the production of male flowers.
Once you get to the third and forth generation laterals, it becomes very difficult to follow the vines out and know where the laterals need pruning. At this point, I walk along the gourd patch, fence or trellis and look for vine tips, look along that vine and see if it is developing male or female flowers. If you see at least two male flowers forming it is safe to prune the tip of that lateral.
OVERZEALOUS PRUNING can result in all females and no males! Be sure you allow at least 6 leaves per lateral to insure male flower production.
Page 7
Pruning the Gourds
Removing the first fruits
Once your laterals begin to produce baby fruit, try pruning the first fruits that grow on your first laterals. Based on a Japanese Gourd growing book, we found that pruning off the first gourds that grow from the knuckle, it will produce double gourds within the knuckles. We do not know to what extent this can be done or how many and how far you can go before your gourd vine is stressing for growth. We will look into this process further and update this as we learn more. Smaller gourds will obviously tolerate more gourds since they mature rapidly.
*We don know this, on last years crops we experimented with a few of our gourds on a trellis, and I pruned some of the baby gourds off, and we had several knuckles that were growing two and three gourds from one knuckle.
This we do know, the Japanese Horticulturalists, some of the leaders in the world on gourd growing, have been able to grow nearly 1,000 Sennari's on one vine, and more than 50 Hyakunari's, (an 11-14 pound bottle gourd) on one vine. In fact the name Hyakunari means 50 gourd from the heart of one vine.
* Some of our efforts are experimental, we suggest proceeding with this process with caution. Gourd vines will produce numerous gourds, so the pruning of a few gourds should be safe. Our experience and observations suggest that perhaps pruning the babies early in the vines life may even tend to have a healthy effect on the later fruits.
Page 8
Designer Gourds
Cross Pollination
Cross pollination affects next years gourds: Create your own designer gourds of different varieties grown in the same area without disciplined hand pollination will cross pollinate. Cross pollination will not alter the size or shape of the gourd you have planted. In other words, if you plant a Sennari, and the female Sennari receives pollen from an African Zulu, the Sennari that grows on the vine will not be altered in size and shape, however, the seeds inside the Sennari will grow a new shaped gourd, and possibly a variety of shapes. Leaving this process to the random acts of nature, a variety of gourds would produce seeds that would grow an undefinable variety of shapes and sizes. What do you do if you want something specific?
There is no set of rules that will allow you to create the perfect gourd of your desires, however there are some rules of thumb that you can use to apply so you can direct your cross pollination with a goal in mind. Rather than shaping and sizing your next years gourds, you can influence the size and shape of next years gourds.
SHAPE: While the male plant will not absolutely replicate itself through the seeds of the female, however the male plant will bear a very strong influence on the shape of the next generation gourd. The female will also have some influence on the shape, so if there is a particular size and shape you are trying to accomplish, you should select your female with this in mind and pick a female gourd that is similar, or at least not totally opposing the desired shape you are trying to achieve. We did successfully create a kettle gourd about 1 pound in size by cross pollinating a male kettle with a mid sized Sennari. We also got an African Zulu gourd to have a pointed crown cao by cross pollinating a male Hyakunari flower with a female African Zulu.
SIZE: The female to be pollinated will have its strongest influence on the size of the gourds that will be grown in the next generation. The easiest way to think of this, and remember which one influences size, and which influences shape is to look at the female. If you are talking a small female like a Sennari, the gourd is small, and therefore the seeds are small. Small seeds will grow small gourds, large seeds will grow large gourds, therefore, the female will have it’s greatest influence on the size of your new designer gourd and the male will have it’s influence on the shape
We do not have the time nor the area at this point to attempt this, but if someone is interested we would love to see the outcome of the following cross pollination, this is a designer gourd I'd like to see:
If you are pushing for a specific shape like a very large bottle gourd, it may take a few years and a carefully controlled pollination process. If you want a huge Mexican Bottle, you may want to hand pollinate a male mexican bottle gourd flower with a female 50 pound kettle. Protect the pollination process, (see our hand pollination tutorial) and next year grow Mexican bottle gourds again, as you may need to cross pollinate with the male again to further influence the desired shape.
Once you have the desired shape gourds, protect those seeds, and hand pollinate them generation after generation. During this process simply use selective breeding, and pick the gourds that are closest to your desired final gourd. I have been told that once you have isolated a variety of gourd for 5-7 generations you then have a new successful variety.
Page 9
Gourd Flowers
For identification purposes this pen drawing by Tim Moyers is presented here for further identification of the Gourd flowers.

The Male flower, (top) has a yellowish satin appearance, this is due to the pollen that is concentrated on the center parts of the male flower. The female flower initially has a glossy or semi glossy appearance. If you use our hand pollination technique, you will be able to see a very noticeable difference when the female is properly pollinated as it will take on a satin appearance from the pollen.