| |||||
|
The Gourd Report 3 weeks past, now your ready... Take the bucket to a remote location away from your house, the back corner of your yard, or to a field, (if you have neighbors close by, you might want to ask them first, because the first rotting is by no means pleasant), take the lid off your bucket and dump it out. Have a hose running near by, (do not use a spray nozzle or you are likely to get splashed in the face with it, YECH!!), and take your gourd pieces out, rinse them off, and use your hand under the running hose to wipe the skin off. Dump the inside of the gourd out wet, and rinse it out thoroughly. The seeds, and everything should pour right out of the gourd like a seed soup. Once rinsed and cleaned, put the pieces of gourd back into the bucket, fill it with water, and place the lid back on the bucket. Each time you fill the bucket, you should fill it to the brim, and let the pushing of the gourds by the lid, displace the excess water in the bucket, to insure that the entire gourd is submerged. Once the lid is on it, let it soak again for 2 weeks.
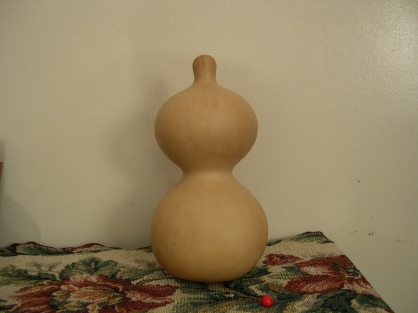
Fig 7 - A Hykunari cleaned by rotting process
The Gourd Report Soaking the gourd the second time accomplishes 2 things, one it reduces the odor the second time around, and it also creates additional rotting for anything that may have been left behind. After rinsing them off from the second rotting, place them back into the bucket, fill it with water, and soak again, this time for a week, dump it and fill it again for another week. This will remove almost all the smell entirely. Once removed from the bucket, allow the gourd to dry, rotate the gourd, from right side up to up side down for the first few days to prevent water spotting from water settling in one spot on the gourd. If it is odor free, you can place it in the oven to dry. If you do not do the additional rotting, and only soak the gourd once, it will take months for the odor to leave the gourd, but by using the repeated process, your gourd will be beautiful, and the odor will be gone when it dries. This sounds like a lot of work, but in reality, the work is not as hard as the scraping and sanding one would normally do. The time required to rinse a gourd each time is only a minute or two, and the water does all the dirty work. It is also absolutely dust free and mold free, which is good for your health and your lungs will love you for it, and the end result is a beautiful gourd. Up until now, we have explained the cleaning techniques that have been used by people and cultures from around the world, but now we would like to introduce something new, or at least, we’ve not heard of it being done before.
The Gourd Report FROM THE VINE TO THE CRAFTING TABLE IN 5 DAYS This technique requires green cleaning, so your gourd must fit the criteria of being one that can be green cleaned without shriveling. We do this with everything from mini gourds, (which will actually dry in 2-3 days) to our 2-3 pound Hyakunari’s, which will dry in 4-5 days. We also have a method by which you can knock a few days off the drying process for these larger Hyakunari’s. Once you have scraped and lightly scrubbed the skin off the gourd, set your oven to 175 degrees, and place your gourd inside the oven. Check your gourd once or twice per day, depending on how large they are will be a big factor in how long it takes them to dry. The first sign of the drying process is the surface will get lighter in color, and will turn tan. Once the entire shell is a tan color, the shell has dried, but there can still be a lot of moisture on the inside of the gourd. The next factor is the weight of the gourd, a gourd that starts off at 2-3 pounds, will weigh ounces when it is dry. Keep checking until the gourd feels like it is about as light as you expect it will get, and hold it firmly by the top and shake it to se if you can hear the seeds rattling around. If it seems light enough but you do not hear the seeds yet, try hitting it into the palm of your other hand to break the seeds loose, if they do not break loose so you can hear them rattle, then it is not yet dry. If you can hear the seeds rattle, it still may not be fully dry, but with some experience you will be able to tell the sound of dry seeds and wet seeds, as the wet insides give a muffled should, more like hitting a sponge or blanket, while dry seeds have a nice crisp sound.
| ||
Gourds>Educational>The Gourd Report 1
|
Gourds TGR Associate Store Educational YouTube Videos Galleries Products Web Hosting Electronic Sales TGR Shopping Mall Shop by category
Website updated in whole or in part daily
© 2003 The Gourd Reserve ™
Daily Sales Online / Everything Makes Scents / The Joy of Hope Foundation / Music and the Arts / Carmellas Place / Danos Place / Family Friendly Forums / The Dunkin Academy
Web Design by Dan Dunkin


